Thursday, March 15, 2012

Peanut Butter & Jelly Yum Yum "Sushi" Rolls


 It is hard to be witty or creative when I am in a state of peanut butter and jelly induced bliss.     

I think we can all agree that a simple PB&J feeds a hungry tummy and the soul.  Yesterday I would have agreed  that there is no room for improvement.  But today for snits and giggles I made a "sushi" roll version. So as it turns out I was wrong there was room for improvement.

This is a great recipe for the little ones, your Peter Pan types and the silly at heart.  

All you need is peanut butter, jelly and a great sandwich bread.  I chose this Italian bread that is larger than regular sandwich bread. 

I chose strawberry jam after careful consideration.  My fridge is stocked with cherry, guava and Frutti di Bosco jams.  But I this recipe called for a classic. 

The peanut butter is creamy.  Do I really need to explain more?
 
 Spread onto your bread.  Leave 1/2"on the end without peanut butter or jelly.  When you roll peanut butter and jelly will "squish" out and you want a clean end.  

Now roll and voila you've got PB&J Yum Yum "Sushi" Rolls.

Friday, March 2, 2012

Almost Vegan Style Chinese Steamed Buns


Mr. Chica and I always ring in the new year with Chinese food.  This past new year's eve was no exception.   

Since we ran a 10.5K race I prepped the Char Sui Bao (aka steamed buns) the day before.  That turned out to be a stroke genius.  I finished the course 1 hour and 9 minutes and for 48 hours after hobbled around on sore legs.  So having buns ready to eat was a blessing.

You don't have to run 10K to enjoy these tasty little buns.  So what are you waiting for?  Get started!

The recipe below is vegan friendly version of Cooking Light's Steamed Pork Bun recipe.    

Filling:
1 cup textured soy nuggets soaked in 3 cups of hot water 
1 teaspoon Five Spice Powder
3/4 cup sliced green onions 
1 teaspoon minced peeled fresh ginger
1 teaspoon minced garlic
3 tablespoons hoisin sauce
2 tablespoons rice vinegar
1/2 tablespoon Bragg's Liquid Aminos
1 1/2 teaspoons honey (omit the honey and it is vegan)


Filling:
Drain soy when soft and mix with Chinese Five Spice Powder.

Lightly spray a pan with oil and add green onions, garlic and ginger.  Sautee for two minutes then add the remaining filling ingredients and mix.  Then remove from heat.

Dough:
1 cup warm water (100° to 110°)
3 tablespoons sugar 
1 package dry yeast (about 2 1/4 teaspoons)
3 1/4 cups all-purpose flour (about 14 2/3 ounces) 
3 tablespoons canola oil 
1/4 teaspoon salt 
1 1/2 teaspoons baking powder

To prepare dough, combine 1 cup warm water, sugar, and yeast in a large bowl; let stand 5 minutes.


Lightly spoon flour into dry measuring cups; level with a knife. Add flour, oil, and 1/4 teaspoon salt to yeast mixture; stir until a soft dough forms. Turn dough out onto a lightly floured surface. Knead until smooth and elastic (about 10 minutes). Place dough in a large bowl coated with cooking spray, turning to coat top. Cover and let rise in a warm place (85°), free from drafts, 1 hour or until doubled in size. (Gently press two fingers into dough. If indentation remains, dough has risen enough.)

Punch dough down; let rest 5 minutes. Turn dough out onto a clean surface; knead in baking powder. Let dough rest 5 minutes.

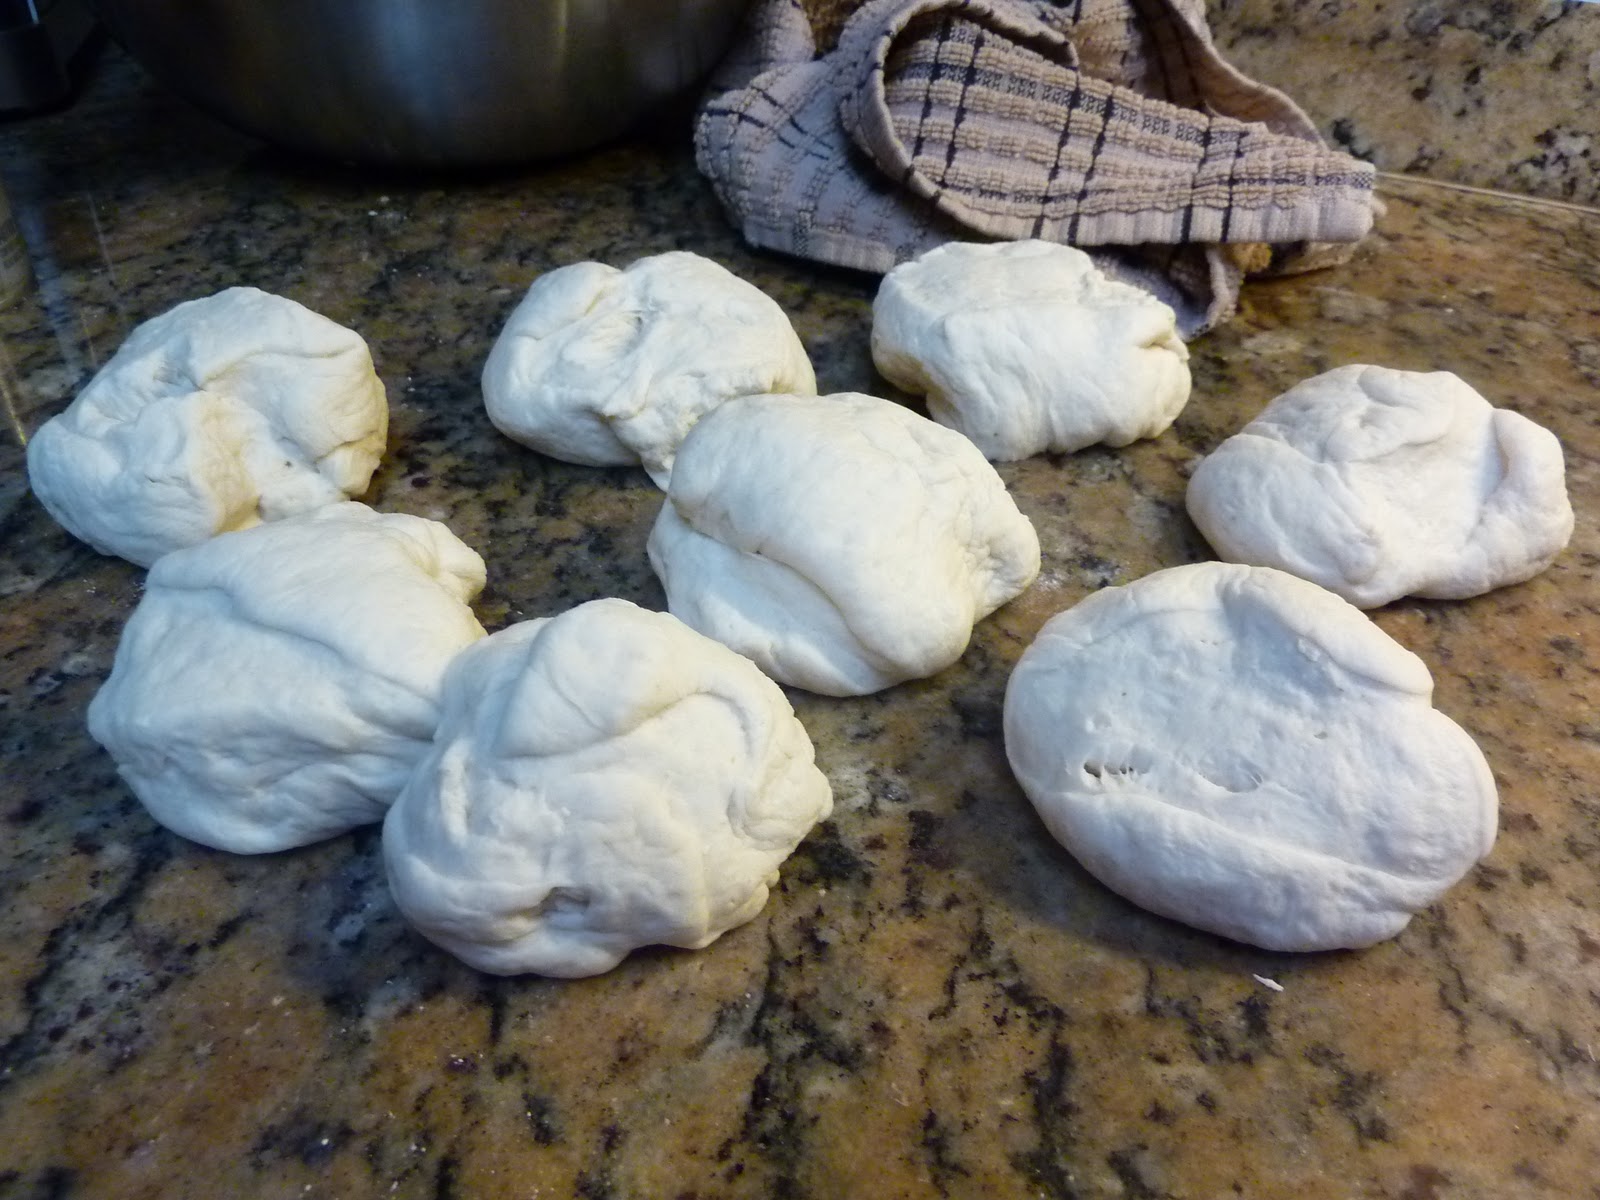
Divide dough into 10 equal portions, forming each into a ball. Working with one dough ball at a time (cover remaining dough balls to keep from drying), roll ball into a 5-inch circle. Place 1/4 cup filling in center of dough circle. Bring up sides to cover filling and meet on top. Pinch and seal closed with a twist. Repeat procedure with remaining dough balls and filling.

As you can see I do 8.  I like big buns.....please feel free to insert your best Sir-Mix-A-Lot jokes here. 

Arrange 5 buns seam side down, 1 inch apart, in each tier of a 2-tiered bamboo steamer. Stack tiers; cover with lid.

Add water to a large skillet to a depth of 1 inch; bring to a boil over medium-high heat. Place steamer in pan; steam 15 minutes or until puffed and set. Cool 10 minutes before serving.

Serve with Thai Sweet Chili Sauce.


Friday, February 17, 2012

Love Is All Around

Love Necklace - Sterling Silver & Bronze
 Earlier this week my mother told me that one of her dearest friends had been diagnosed with cancer.  It was unexpected and a tough blow for everyone.

Rather than wallow this amazing woman has rallied and is ready to face what lies ahead and come out smiling.  Make no mistake the road ahead is going to be rough.  There will be surgery and radiation therapy.  But she has wonderful medical care, a loving husband, supportive friends and a devoted dog.  And now a necklace meant to remind her that she is loved.

I wanted the necklace to have meaning so I gave the design serious thought.  Though simple it was created with her journey in mind.

Bronze is a metal alloy whose healing power is tied to touch.  Physical contact is said to bring calmness and meaningful thoughts. The simple bar shaped pendant is meant to easily be grabbed and touched.   With time bronze tarnishes taking on a rustic gold tone.  She can easily clean it by wiping it with any fabric.  But the stamped letters will only become darker and more prominent with time.  Always reminding her that she is loved.

The pendant is backed with sterling silver and hung on a sterling silver round snake chain.
Monty modeling with the necklace

I hope she finds the necklace to be a comfort.  It was made with the best intentions.  


Monday, January 30, 2012

How to Wash, Dry & Store Your Enamel

I adore color.  So it was love at first sprinkle with enamel.  My first few sessions I was fortunate enough to use someone else's materials.   That meant I didn't have to prep the enamels and used a huge kiln.

These days I am on my own with a humble little beehive kiln and prepping my own enamels.  Though it can be time consuming washing enamel is essential for translucent, as well as opaque enamels.  It ensures a truer color and a better final product.    

The added bonus is that the filtered material can be used for counter enamel.  That will save you a few bucks.  Who wouldn't love that?  

This video from Art Jewelry magazine is a great step by step for anyone interested in learning how to wash, dry and store their enamels.  I hope you find it helpful. 

Sunday, November 20, 2011

Pumpkin Gnocchi with Cranberry Walnut Pesto

Pumpkin Gnocchi with Cranberry-Walnut Pesto
The first truly delicious gnocchi I ate was at a random trattoria in Genoa.  Those lithe pillows swimming in pesto were the start of a love affair.

Two years ago, we spent eight months in Buenos Aires.  Italian roots run deep in Argentina so while there is plenty of beef with chimichurri there is also amazing pasta.  Every neighborhood has their "pasta joint" which sells fresh pasta.   I found the world's best gnocchi not to mention incredible agnolotti on the corner of Soler and Dorrego in Palmero Hollywood.  The traditional potato version was delicious. But nothing compared their heavenly gnocchi de calabaza (pumpkin gnocchi).  We must have eaten hundreds during our stay.

Organic Cabernet from Argentina
Nowadays, if I need a gnocchi de calabaza fix I can't run to the corner and pick it up.  Those days are gone.  All cravings have to be satisfied with my own cooking know how.  So I did a little research and discovered a Pumpkin Gnocchi with Cranberry Walnut Pesto recipe on Would Rather Gather's blog.   Not only is it delicious but it is also vegan.  You can see how it went below;


The key to this recipe is having the dough remain a bit ooey-gooey.  A more solid dough will yield tough heavy gnocchis.  So stick close to the flour amounts provided and resist temptation to add much more. 

I boiled the gnocchi and then transferred to a pan for a quick sear.  Then mixed it with the pesto.  Viola it was ready to serve with a wonderful organic wine.   

This is an incredibly tasty recipe that I can't recommend enough.  It has the added bonus of being vegetarian, vegan so wonderful even meat-eating pals would pronounce it a satisfying meal. 

This year we'll be eating this for Thanksgiving with simple green salad and a meringue topped cranberry curd tart.  But that will be a future post all it's own.    

Tuesday, November 15, 2011

Orlando Philharmonic Concert at Bok Tower


Intermission
 On our recent jaunt to the Orlando area to see family and do a little shopping we added an outdoor concert by the Orlando Philharmonic Orchestra to our itinerary.

The event was held at the Bok Tower Gardens in Lake Wales, Florida about an hour outside Orlando.   The setting was lovely in spite of the uncharacteristically windy and chilly night.  

Live music, especially classical or opera, holds a special place in my heart.  The love affair began when my parents took me to see The Nutcracker.

My mother bought me a gorgeous burgundy velvet frame bag with a gold tone chain strap.  I held it on my arm as if it were a Birkin bag.  It seemed that glamorous to twelve year old me.  The bag was just the beginning.

Bok Tower

While I loved the lithe graceful ballerinas, I was entranced by the music.   There was a power and life that simply didn't exist when played on our stereo.  It gave me goosebumps.  As a teenager, I patronized the El Paso Symphony but my tastes turned a bit modern.  So I also saw Gwar or The Smithereens while still dressing up and listening to string quartets.

While I still listen to alternative tunes favored by aging wanna-be hispter goofs, I remain faithful to classical music and my beloved opera.  So this was a real treat.
My Pop and I

Shoes off and relaxed.

Intermission
This concert was a much different experience than my usual symphonic outings.  My mother's lovely gift had impressed upon me the need to dress up if someone was putting to bow to strings.  So an outdoor concert presented more than a few challenges.

For seating we "borrowed" a blanket from the hotel.  It was the perfect size and easily smuggled out in a large tote bag.  With that taken care of my concerns turned to wardrobe.

The nippy weather was perfect for comfy snuggley clothes.  Even so for me jeans or a sweatshirt with sneakers wasn't an option.  My mom didn't raise me that way. I wore tweed pants, a silk shirt and cozy cowl neck sweater.   I actually showed up in heels!  Once I saw the grassy pathway to the venue I put on my trusty ballet flats. 

My dad wore his beloved West Virgina baseball cap.  And despite his aversion to taking pictures he posed for a few to pacify his pushy daughter.  

He loved the music even singing along to a few of the songs.  I shooshed him and he ignored me.  Order remained in the universe. 

When the cold got to be too much we packed up and headed out.  Each of us chilled to the bone but happy to have ventured out to enjoy the music and the company.
Snuggling my fave partner in crime and concerts.
A little wine to keep warm. 


Tuesday, October 11, 2011

Granola Goodness - Recipe

Our house runs on granola. It is a healthy versatile snack that travels easily and makes a great gift.

This holiday season I plan to give granola as gifts.  A portion of today's batch is headed to the home of a dear friend who just had her second child earlier this week.  Normally, we give frozen meals but I thought a hearty snack might come in just as handy.  

Another plus is that you can share granola with just about everyone, especially vegan friends. I like to refer to my recipe as vegan friendly which is a little silly.  It isn't as if there are people out there making granola with ground beef or spare ribs. Though with the current bacon craze you never know.   

My point is that this is why I love my homemade granola, it can feed just about anyone.  It is loaded with healthy ingredients that qualify it as pure nutritional gold but so also damn yummy it'll have you lickin' your fingers and asking for more.  I've shared batches with friends and neighbors and all have asked for the recipe.  I have yet to share it until today.

Boo's Granola (Need a Better Name)


Dried pineapple & peanut butter . 


Dry Ingredients 
8 cups rolled oats
1 1/2 cups sugar (optional - without sugar it has a cleaner taste)

Additions 
1/2 cup of any or all the following - shredded coconut, slivered almonds, flax seeds, raisins, dried pineapple, apricots, dried cranberries, wheat germ or anything else that tickles your fancy

Wet Mix 
1/2 cup maple syrup
1/4 cup honey
1/2 cup water
1/2 cup peanut butter
1/2 cup canola oil
1 1/2 tablespoons molasses (decrease or optional - this is gives a deeper flavor)
1 tsp vanilla extract
1 tsp almond extract

Preheat oven to 200 degrees and oil baking baking sheets.  I use a canola spray to use as little oil as possible.  Please note this is not the canola oil listed in the wet ingredients.

The wet mixture before heating
Combine all wet ingredients in a small saucepan and warm the mixture then whisk until smooth.


Combine the two mixtures
Pour wet mixture into dry mixture and combine with a wooden spoon until evenly distributed.  I also like to use my hands to make sure they are clumpy pieces.

Bake all the granola at the same time

Spread evenly in the baking sheets.  Ensure you have single layers so that pieces cook evenly.

Bake for 3 hours or until lightly browned and crunchy.  I rotate the baking sheets every 45-60 minutes.  To test that the granola remove a small piece and allow to cool.  Then taste it is crunchy then it is ready.

Allow to cool and store in airtight containers. 

I am gifting some of this batch in a glass juice jar.  Not only this a yummy and healthy gift but now environmentally friendly too.  Trifecta!
The perfect gift.

On a side note, I've been struggling for months to come up with a good name for my granola.  Any suggestions would be appreciated.  


Wednesday, October 5, 2011

The Curse of Belfast Linen

Prairie Moon's Crypt Club Pattern
In a world where we tend to focus on imperfections and ways we don't measure up it is a welcome relief to like something about yourself.  Personally, I love that I tend to dive head first into crazy crafting plans without regard for my actual abilities or skill level.

I just assume where there is a will eventually there will be skill.  It is how I learned knitting, beading, sewing and every other crafty endeavor I have taken on.  It is also how I ended up with a lovely counted cross stitch pattern to be stitched on teeny tiny Belfast linen fabric.

To date my counted cross stitch patterns have been stitched on aida cloth that blind grannies can see without their bifocals.  I like the simplicity.  So when I ordered the fabric for Prairie Moon's, Crypt Club pattern it never occurred to me that it wouldn't be on giant 18 count aida cloth.  I didn't even ask - that is how clueless I am.

So now I find myself with a pattern I adore and fabric that scares the bejesus out of me.  There will be tears of frustration, curses that make my hubby's toes curl and fits of anger.  But I am hoping there will also be screams of joy, a sense of accomplishment and ultimately tears of joy.  I won't know if I don't try.  Once again I'm diving knowing I am in above my head before I even hit the water.  Is it crazy that makes me happy?      

Monday, September 26, 2011

Pride Goes Before the Misspelled Fall

I love that feeling, you know the one where you are just zipping along a project.  Things are going so fast and so well that you begin calculate when you'll be done.  In those moments, I feel like queen of the craft.

It exactly as they say, pride does come before the fall.  A quick glance to the left and you can see why the queen of craft has been demoted to jester.

The kick ass pattern is a lovely holiday offering from Subversive Cross Stitch.  If you don't know them but speak sarcasm fluently get thee to their site.

Meanwhile back at Castle Craft, I am working to fix my mistake so the intended giftee knows that I truly wish them a happy fucking holiday.  It's just how I roll.     

Thursday, September 15, 2011

How to Make Gift Tags

For me nothing is more wonderful than handmade gift. This may explain why I have crafted everything from scarves to spice mixes to gift friends and loved ones. Each gift is made with loving care so I think the packaging should express the same sentiment.

I recently finished a Clapotis for one of my dearest friends. I couldn't bear the thought of it traveling to Texas in an ugly box. So I looked for the perfect box.  I got lucky and found a pale minty green box with polka dots.  Next, I  rustled up coordinating tissue paper and made the gift tag.  The end result was a sweet perfection.  

I had never made my own gift tag before.  So there was a little trial and error.  In the end I was able to create what I hope is pretty and practical keepsake for the giftee.   


 How to Make a Gift Tag


Print each side of the tag on the same sheet of paper. 
 Print out the gift tag text.  In this case I was doing a two sided tag so I had to ensure there was enough space between the text of each side.

The backside had fiber and care instructions.  This can be pretty handy for knit and crochet items.    
 Then cut the gift tag out of a light cardboard.  The shape can vary.  In this case I went with a traditional shape.

The tag can also be used to put extra buttons, yarn or thread. 
Cover one side with glue and adhere the printed text. Trim. Repeat on the other side.  Add any embellishments.  Finally, using a hole punch make a hole.  You can use this to attach the tag to the gift.  

Monday, August 15, 2011

Never to Early to Plan

Every year around August it dawns on me that high holidays are around the corner.  Thanks to shifting nature of the lunar calendar I am not immediately sure which corner.  A mystery easily solved by googling. 

The googling is quickly followed by oggling of cooking sites and blogs for the perfect Rosh Hashanah menu.  A task made infinitely harder since I am a lactose intolerant vegetarian.  There is no substitute for brisket.....none.  So the hunt is on. 

For those of you not in the know, the traditional food is apples and honey.  Delicious, healthy and tough to make savory without dairy.  So any suggestions are appreciated. 


Thursday, August 11, 2011

Ring-a-Ding-Ding Baby!

Ever since the Mister and I tied the knot at The Excalibur, I've had a soft spot in my heart for good ol' Vegas.  So I as thrilled when he suggested we go back so he could attend a conference.  Let's face it Vegas is "where else on Earth could this happen kind of town."

Honestly where else can you:

 See Mike Tyson....
 Win $14.64 on a Top Gun themed slot machine.....
 Kick yourself for wasting your $5 gambling money on Top Gun when there is a Star Wars slot machine....
 Fist bump a gorilla statue....
 See a barefoot bikini clad woman in a hotel casino on her cellphone yelling at some unfortunate soul....
 See a fountain show set to Elvis' Viva Las Vegas....
 See an uber-creepy Beavis and Butthead posing for pictures with strangers....
 Have Tahitian Vanilla-tinis at 2 pm in the afternoon....
 

 and best of all see dear friends? Why Vegas, of course!

Sunday, July 24, 2011

Sunday Brunch or What to do With Leftover Polenta

Italian Eggs Bendicto
It is the question that eternally plagues home chefs - what to do with leftovers that are too yummy to toss.  I was faced with dilemma after overestimating how hungry my husband and stepson would be after a morning of surfing.

The hubby came up with the brilliant idea of making an egg dish.  We both love brunch and Eggs Benedict.  But as vegetarians yummy brunch classics rarely pass our lips these days.  So those bare polenta cakes screamed Eggs Benedicto!   


Eggs Benedicto

3 polenta cakes
2  tbs olive oil

Tomato-Basil Topping 
2 tbs olive oil
1/2 onion finely chopped
1 tomato chopped
1 small clove of garlic minced
Splash of water
3 tbs fresh basil in chiffonade
**If you don't know how to chiffonade click here**
Salt and pepper to taste. 

3 eggs 

Heat the olive oil in non-stick frying pan on med-high heat..  When hot add polenta cakes and cook until a golden crust with toast points are on both sides.  Remove and place aside in a dish.  Keep warm.

Reduce to medium heat.  Add onions and cook for two minutes.  Add oil if needed.  Next add garlic, tomato and water.  Salt and pepper to taste.  When the tomatoes are visibly cooked add the basil place.  Cook 10-15 more seconds then place in a bowl and keep warm.

Wipe out the pan.  And prepare as you like to fry the eggs.  Cook the eggs over easy.  The key to this dish is a lovely runny yolk.   

Assemble the dish.  Place the polenta then add the egg and top with the tomato-basil topping.   You can also used poached eggs and/or top with Parmesan cheese.

To make vegan friendly simply remove the eggs. 


Friday, July 22, 2011

Tropical Vanilla Mango Jam

Laundry basket full of mangoes
 When Maria Von Trapp, then Sister Maria, sang about her favorite things she forgot to mention homemade mango jam.  Granted it was World War II Austria where mangoes weren't likely to be a popular fruit.  And there was the rise of the Third Reich and that fact that the problem known as Maria was fictional.  But I firmly believe had she known she would have found a way to rhyme to mango jam with raindrops, kittens and warm woolen mittens. 
  
Monty guarding my precious mangoes
 My mango jam adventure started as Costa Rica's mango season was winding down.  Warm sunny days started to give way to rainy gray skies and roadside fruit stands were desperate to sell quickly ripening mangoes.  Signs offered crates of mangoes for $5 US dollars.  I can't resist a yummy ripe mango or a bargain.  So I bought crate and dreamed of all the goodies I could make.

As it turns out a basket of mangoes can go pretty far.  I made jam, fruit parfaits, pies and smoothies.  But the Tropical Vanilla Mango Jam was the best.  Like bottled sunshine.   


 Tropical Vanilla Mango Jam


Ingredients:

  • 6 cups semi-ripe or ripe mango slices
  • 2 cups water
  • 3 cups granulated sugar   
**( I decreased it to 2 cups and cooked slightly longer)
  • 1 tablespoon vanilla extract

Preparation:


Chopped mangoes at a boil
 Combine the mango slices and water in a saucepan and boil over moderate heat for 15 minutes, until the mangoes are tender. 


Pureeing mangoes in the pan with immersion blender

Press this mixture through a sieve, or process in an electric blender or food processor until smooth.   

I opted to use my handy-dandy immersion blender.  So there was no fussing with moving boiling hot fruit to a blender or food processor.  If you don't have an immersion blender a potato masher would be just as effective. 

Adding raw sugar
Return to the saucepan and add the sugar and vanilla extract.


Mangoes with sugar and vanilla boiling
 Boil for 30 to 40 minutes, until thick and the proper consistency for a jam


The delicious finished product


Pour into hot sterilized jars and seal.  Let cool then store in refrigerator and/or give as gifts.  The jam should be consumed within 4 weeks.